Mudflaps Fitting


T6 Mudflaps
*These are designed specifically for the T6 Tailgate but can be adjusted to fit other models. This is not a straight fit and the best fit is on T6 Tailgate vans. They will not fit the T5.1 or any barn door model across the range
T6.1 - The rear units fit directly to the T6.1 but the fronts needs an adjustment depending on whether the vehicle is fitted with an undertray. If you offer up the fronts to the underside you will see where the 6.1 underside sits approximately 8-10mm lower. A small section will need to be cut out to allow for fitment.
T6 Tailgate
Step 1: Remove the 2 screws holding the arch liner in place by using an Allen key or spline. Make sure you clean the head of the screws, they will probably be covered in dirt from being in the wheel arch (It is fine to use the existing fixings in the van already but we will provide new ones too)
Step 2: Place the mudguard in place. The two holes in the mudguard will line up with screw holes left in the wheel arch liner
Step 3: Take the screws provided or reuse the existing screws previously removed to attach the mudguard to the arch liner


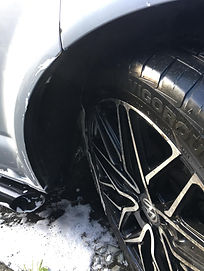

Front Mudflaps
Step 1: Turn the wheel so you have better access to the single screw holding the arch liner in place. Use an Allen key or TRX to remove this screw
Step 2: Add the metal clip to the arch liner (see photo)
Step 3: Offer the mudflap up and make sure the holes in the mudflap line up with the existing hole in the rebate of the arch liner and the newly inserted clip. You might need to tweak the location of the clip slightly
*The mud flaps come with an additional hole and additional clip but these aren’t needed to secure.
Step 4: Using the existing screws or the new ones provided, attach the two screws through the mudflap back into the arch liner. The screw going through the clip will take some pressure with the Allen key / screwdriver to make a secure fixing.